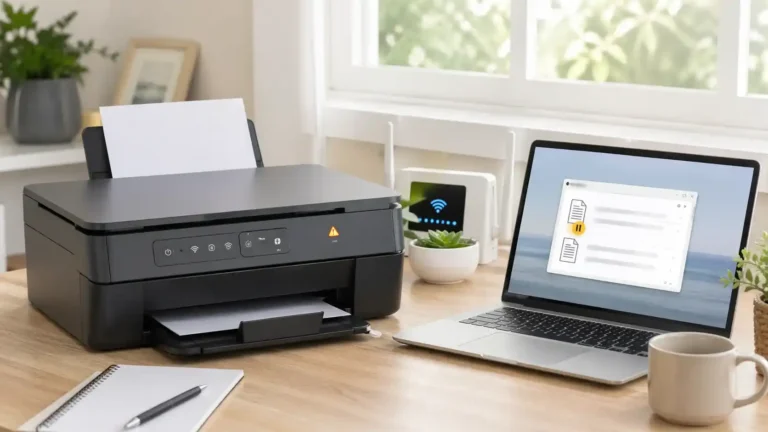
Printer Not Printing Properly? Fix Alignment, Ink, and Print Quality
If your printer is not printing properly, the cause is usually related to ink or toner, printhead alignment, clogged nozzles, paper type, print settings, the print queue, or worn printer parts.
This guide is for printers that still print something, but the result looks wrong. That includes faded text, streaks, missing lines, blank sections, blurry output, crooked printing, smudges, or colors that do not look right.
If your printer does not print anything at all, start with the main printer not printing guide instead. This page focuses on print quality problems.
Table of Contents
First, identify what “not printing properly” means
Before changing settings or replacing cartridges, look closely at the printed page. The symptom usually points to the right fix.
Faded or very light printing
Faded printing often means the printer is low on ink or toner, using draft mode, printing on the wrong paper type, or struggling with a clogged printhead.
On a laser printer, faded output can also point to toner density, the toner cartridge, drum, transfer area, or fuser. On an inkjet printer, it often points to low ink, dried ink, or blocked nozzles.
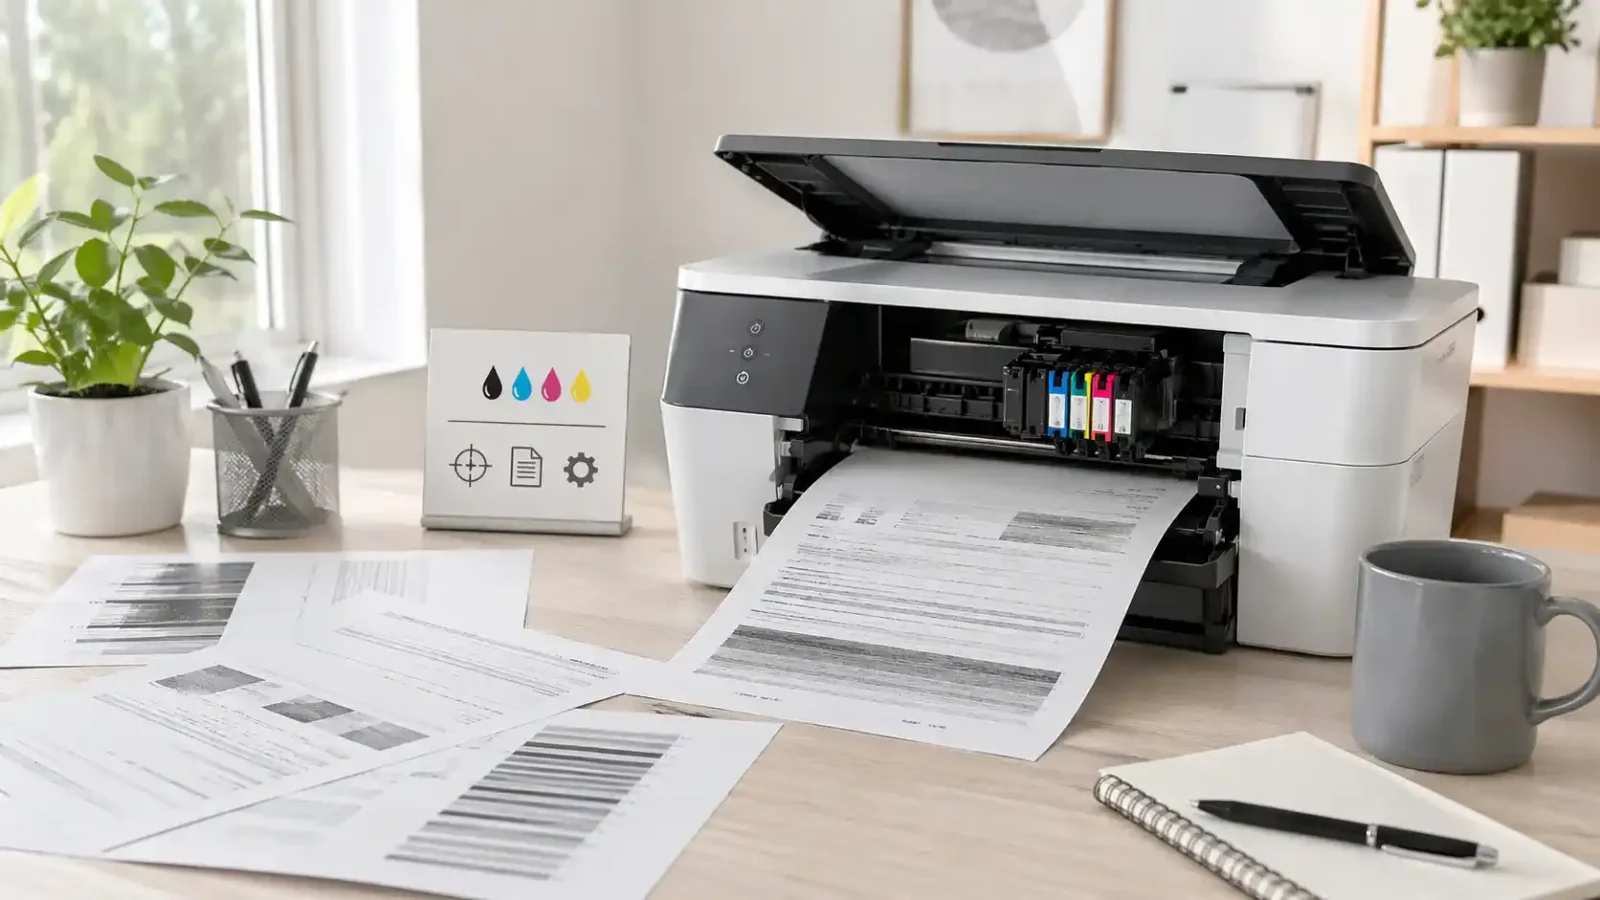
Streaks, lines, or banding
Streaks and horizontal lines usually happen when the printhead nozzles are clogged, the cartridge is nearly empty, the printhead is dirty, or the toner is not being applied evenly.
If the same line or mark appears in the same place on every page, the problem may be inside the printer rather than with the document.
Blank sections or missing words
Blank areas can happen when ink is not flowing correctly, a cartridge is not seated properly, the printhead is clogged, or the printer is receiving an incomplete print job.
If only one document prints with missing sections, the file or app may be the problem. If every test page has blank areas, focus on the printer, ink, toner, or printhead.
Blurry, shadowed, or misaligned printing
Blurry or shifted text often points to an alignment problem. This can happen after replacing cartridges, moving the printer, loading paper unevenly, or using the wrong paper size setting.
Alignment is especially important when text looks doubled, images look slightly shifted, or straight lines do not meet cleanly.
Smudged print
Smudges can come from the wrong paper type, damp paper, ink that is not drying correctly, toner that is not bonding to the page, dirty rollers, or a fuser issue on a laser printer.
If the print rubs off after it comes out, the paper type, toner, or fuser should be checked.
Wrong colors or missing colors
Wrong or missing colors may happen because a color cartridge is empty, a nozzle is clogged, grayscale mode is turned on, or the driver is using the wrong color setting.
This article covers color issues lightly because the main focus is overall poor print quality. If the printer mainly refuses to print color or black ink, that may need a more focused diagnosis.
Step 1: Print a test page or print quality report
A test page helps you find out whether the problem is inside the printer or coming from your computer, app, document, or print settings.
Most printers have a test page, nozzle check, print quality report, or diagnostic page in the printer menu, printer app, or maintenance settings.
Look for:
- Faded blocks
- Missing color bars
- Broken lines
- White gaps
- Streaks
- Repeating marks
- Blurry alignment patterns
- Smudges
- Uneven black text
If the test page also looks bad, the issue is likely ink, toner, paper, printhead, alignment, or printer hardware.
If the test page looks fine, the issue is more likely the document, app, driver, print settings, or print queue.
Step 2: Check ink or toner before replacing anything
Low ink or toner is common, but do not replace cartridges before doing a few quick checks.
First, check the ink or toner level from the printer screen, printer app, or computer settings. Level readings are not always perfect, but they are still useful.
Then check the cartridge itself:
- Make sure it is seated correctly.
- Make sure any protective tape or packaging has been removed.
- Check whether the cartridge is very old or dried out.
- Look for leaks, damage, or loose parts.
- Make sure the printer recognizes the cartridge.
- For toner, gently check whether the cartridge is near end of life.
If the print is faded, patchy, or missing in one color, the cartridge or printhead may be involved. If the output has repeated marks or toner smears, a laser printer may also have a drum, fuser, or transfer-related issue.
Step 3: Check the paper and paper tray
Paper affects print quality more than many users expect. The wrong paper can cause smearing, faded output, crooked printing, ink bleeding, or toner that does not bond correctly.
Check these basics:
- Use clean, dry paper.
- Remove curled, damp, dusty, or damaged sheets.
- Do not overfill the tray.
- Move the paper guides so they lightly touch the paper.
- Make sure the paper is not loaded at an angle.
- Remove any small scraps left from an old paper jam.
Also make sure the paper type in your print settings matches the paper in the tray. Plain paper, photo paper, labels, envelopes, cardstock, and glossy paper can require different settings.
If the printer thinks you are using plain paper while you are printing on glossy or thick paper, the result may look poor.
Step 4: Check print quality settings
Your printer may be working correctly but using low-quality settings.
Open the print settings before sending the job and check for:
- Draft mode
- Economy mode
- Toner saver mode
- Low quality mode
- Grayscale or black-only mode
- Wrong paper size
- Wrong paper type
- Incorrect scaling or layout
- Borderless printing selected by mistake
Draft or economy mode uses less ink or toner, but the print may look faint or rough. For everyday documents, use Normal quality. For important documents, photos, or graphics, choose a higher quality setting.
If colors are missing, check whether grayscale or black-only printing is enabled. If text is shifted or cut off, check paper size, scaling, and page layout.
Step 5: Run printer alignment
Run alignment when the print looks crooked, blurry, doubled, shadowed, or slightly shifted.
Alignment is especially useful after:
- Replacing ink cartridges
- Moving the printer
- Loading a new type of paper
- Cleaning the printhead
- Seeing uneven lines or shifted text
Most printers include an alignment option in the printer menu, printer app, or maintenance tools. Load plain white paper, start the alignment process, and follow the instructions shown by the printer or software.
Do not force any internal parts if the alignment fails. If the printer shows an alignment error, check the cartridge seating, paper type, and printhead area before trying again.
Step 6: Clean the printhead or nozzles
If you use an inkjet printer, clogged nozzles are a common reason for streaks, missing lines, faded colors, and blank bands.
Use the printer’s built-in cleaning tool first. It may be called:
- Printhead cleaning
- Nozzle cleaning
- Head cleaning
- Print quality cleaning
- Maintenance cleaning
After cleaning, print another test page. If the quality improves but is still not perfect, one more cleaning cycle may help.
Avoid running too many cleaning cycles in a row. Cleaning uses ink, and repeated cleaning will not always fix a dried or damaged printhead.
For model-specific cleaning and alignment steps, use your printer maker’s official help. For example, HP’s print quality troubleshooting and Brother’s print quality help explain how their tools handle print quality checks, cleaning, and alignment on supported models.
Manual cleaning should be handled carefully. Do not scrape the printhead, use harsh liquids, or push anything into the printer. Follow the printer manufacturer’s instructions if manual cleaning is needed.
Step 7: Check whether the print queue is sending the wrong job
The print queue is not usually the cause of faded ink, streaks, or smudges. However, it can cause confusing output when old or damaged jobs are stuck.
Check the print queue if:
- The printer keeps printing an old document.
- The same bad job repeats.
- Pages come out incomplete.
- The printer prints the wrong file.
- Jobs pause, restart, or disappear.
- The printer starts printing after a long delay.
Cancel stuck jobs, restart the printer, restart the computer, and try one simple test print.
If the queue keeps getting stuck, use the print queue and spooler guide instead of treating it as a print quality issue.
Step 8: Check the driver only after basic quality checks
A driver problem is more likely when the printer’s own test page looks fine, but documents from your computer print badly.
The driver or software may be involved if:
- Only one app prints incorrectly.
- The issue started after a Windows or macOS update.
- The printer uses a generic driver.
- Layout, scaling, or color output is wrong.
- The printer prints fine from another device.
- The test page is clear, but your document is not.
In this case, check the printer driver, printing preferences, app settings, and document layout. You may need to update, reinstall, or switch to the correct printer driver for your model.
For Windows-specific checks, Microsoft’s poor print quality help is a useful official reference when documents look blurry, faded, or streaked from a Windows computer.
Do not start with driver changes if the printer’s own test page is also faded, streaky, or missing lines. That usually points to supplies, printhead, paper, or hardware first.
Step 9: Know when it may be a hardware problem
Some print quality problems do not clear with settings, cleaning, or alignment.
Hardware may be involved if:
- The same defect appears on every test page.
- Repeating marks appear at regular spaces.
- Toner smears or rubs off the page.
- Cleaning does not fix missing bands.
- Alignment fails repeatedly.
- Ink or toner is leaking.
- The printer makes unusual grinding or clicking sounds.
- The printer shows a hardware or service error.
- A laser printer still prints faded pages with a good toner cartridge.
For inkjet printers, the issue may be a dried or failing printhead, cartridge carriage problem, or ink delivery issue.
For laser printers, the issue may involve the toner cartridge, drum, transfer roller, fuser, or other internal parts.
If the printer is under warranty, check official support before replacing parts. If the printer is older, compare the cost of repair with the cost of replacement.
Quick diagnosis table
| Print problem | Most likely cause | First thing to try | Next step if it fails |
| Faded print | Low ink/toner, draft mode, clogged printhead, toner density | Check quality settings and supply levels | Print a test page and clean the printhead if inkjet |
| Streaks or lines | Clogged nozzles, dirty printhead, toner or drum issue | Run a print quality report | Clean the printhead or check toner/drum symptoms |
| Missing words or blank sections | Clogged printhead, cartridge issue, bad job data | Print a test page | Reseat the cartridge and check the queue or document |
| Blurry text | Alignment issue, wrong paper, low-quality setting | Run alignment | Check paper type and driver settings |
| Crooked printing | Paper loaded unevenly, paper guides loose, alignment issue | Reload paper correctly | Run alignment |
| Smudged output | Wrong paper type, damp paper, too much ink, fuser issue | Check paper and media settings | Clean accessible parts or seek support |
| Wrong colors | Grayscale mode, empty color cartridge, clogged nozzles | Check color settings and ink levels | Run a nozzle check or printhead cleaning |
| Repeating marks | Drum, roller, fuser, or internal part issue | Print a test page | Contact official support if marks continue |
| Incomplete pages | Queue, app, driver, or document issue | Cancel the queue and print a simple test page | Check driver or app settings |
What to try first based on your printer type
If you have an inkjet printer
Use this order:
1. Print a test page or nozzle check.
2. Check ink levels and cartridge seating.
3. Check paper type and print quality settings.
4. Run printhead cleaning.
5. Run alignment.
6. Try a simple document from another app.
7. Check the driver only if the test page looks fine.
8. Contact official support if the same defects remain.
Inkjet problems often show as missing lines, faded colors, white bands, blurry text, or color gaps.
If you have a laser printer
Use this order:
1. Print a test page from the printer.
2. Check toner level and cartridge seating.
3. Check toner saver or density settings.
4. Make sure the paper type is correct.
5. Look for repeated marks, ghosting, or toner smears.
6. Clean only the parts the manual says are safe to clean.
7. Contact official support if a drum, fuser, or transfer part may be worn.
Laser printer problems often show as faded text, gray background, repeating marks, toner smears, ghost images, or poor bonding to the paper.
When this is not the right guide
This guide is for poor, partial, faded, streaky, blurry, or misaligned printing.
Use a broader diagnosis if:
- The printer does not print anything.
- The printer is connected but does not respond.
- The printer says offline.
- The printer shows driver unavailable.
- A print job is stuck in the queue.
- The printer has a paper jam.
- The printer is not detected by the computer.
For no-output problems, start with the main printer not printing guide. For stuck jobs, use the print queue and spooler guide.
Final checklist
If your printer is not printing properly, follow this order:
1. Print a test page.
2. Check ink or toner.
3. Check paper and tray loading.
4. Check print quality settings.
5. Run alignment.
6. Clean the printhead or nozzles if you use an inkjet.
7. Clear the print queue if jobs are incomplete or repeating.
8. Check the driver if the printer test page looks fine.
9. Consider hardware or official support if the same defect appears every time.
The best fix depends on the symptom. A faded page, a crooked page, a smudged page, and a page with missing lines can all look like “not printing properly,” but they often come from different causes.
FAQ section
Why is my printer not printing properly even though it has ink?
The ink level may not be the only issue. The printhead may be clogged, the cartridge may not be seated correctly, the printer may be using draft mode, or the paper type may not match the print settings.
Why is my printer printing faded pages?
Faded pages usually come from low ink or toner, draft mode, toner saver mode, clogged inkjet nozzles, wrong paper settings, or laser printer parts such as the toner cartridge, drum, or fuser.
Why is my printer printing streaks or lines?
Streaks and lines often mean the printhead nozzles are clogged, the cartridge is low, the printhead is dirty, or a laser printer part is leaving marks. Print a test page to see whether the defect appears outside your document too.
Why is my printer printing blurry text?
Blurry text is often caused by alignment problems, low print quality settings, damp or unsuitable paper, or paper loaded unevenly. Run printer alignment and check the paper guides.
Why are parts of my printed page blank?
Blank sections can happen when ink is not flowing correctly, nozzles are clogged, a cartridge is not seated properly, or the print job is not being sent correctly. Print a test page first to separate printer problems from document problems.
Should I clean the printhead or replace the cartridge first?
Check ink levels and cartridge seating first. If the cartridge looks fine but the page has streaks, missing lines, or faded colors, run a nozzle check or printhead cleaning.
Can the print queue make a printer print incorrectly?
Yes, but it is usually linked to incomplete pages, repeated old jobs, wrong documents, or stuck jobs. It is less likely to cause faded ink, streaks, or smudges.
Why does the printer test page look fine but my document prints badly?
That usually means the printer hardware is probably okay. Check the app, document file, print settings, paper size, scaling, color settings, and printer driver.
When should I contact official support?
Contact official support if every test page has the same defect, alignment fails, cleaning does not improve output, toner or ink is leaking, the printer shows a hardware error, or internal parts may need replacement.